Welcome! This is my blog about Microsoft Endpoint Manager and Windows deployments. The main purpose of this blog is a notebook for myself, but if somebody gets some new ideas or even can solve a problem with the information available here, then it has been great success to have this blog.
If you use the Service Connection Tool for System Center Configuration Manager updates in offline mode make sure you check the following sites for background info:
Once you master the process and the tool it is quite straightforward task to handle. However, once you run in to trouble it is totally another ball game.
One of my customer is using the Service Connection Tool to get the updates. They run into some problems with the tool and for some reason the content was not fully downloaded. However, once the import option was done by the Service Connection Tool the SCCM Console showed that in this case the SCCM 1806 Hotfix Rollup was “Available to download” with the Package Guid of 338EF926-78A7-4AB6-B5A1-5F12474F0BD3
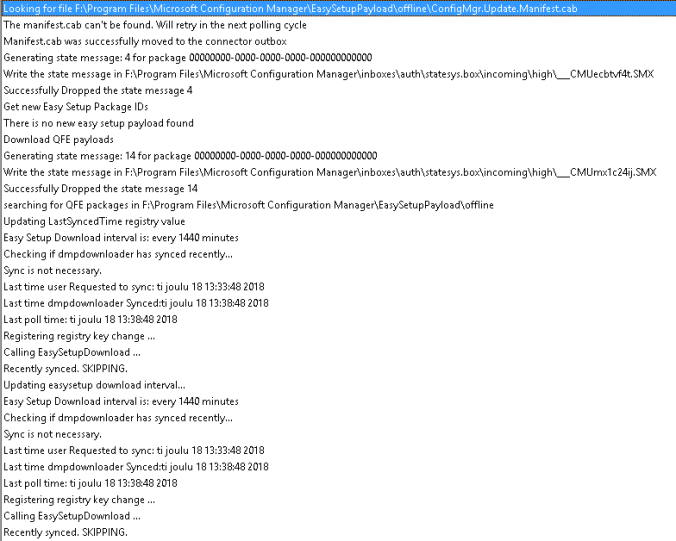
When launching the update from the console nothing happened and I can see from the dmpdownloader.log that it tries to find ConfigMgr.Update.Manifest.cab:
So I need the get the ConfigMgr.Update.Manifest.cab but from where? Search the dmpdownloader.log for “go.microsoft.com” and you should end up to find a similar references to “Easysetup fwlink to download the manifest: https://go.microsoft.com/fwlink/?LinkId=855161 “. So paste the link to a web browser with internet connection and this link will download the ConfigMgr.Update.Manifest.cab that the SMS_DMP_DOWNLOADER -component is trying to find.
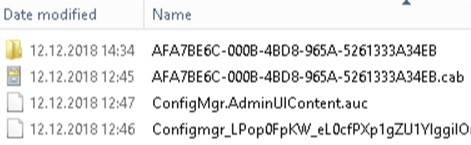
My customer did try to install the SCCM 1806 Hotfix Rollup (338EF926-78A7-4AB6-B5A1-5F12474F0BD3), but it did not find the content of the 338EF926-78A7-4AB6-B5A1-5F12474F0BD3.cab -file, since the Service Connection Tool had only downloaded the new 1810 version even they have not applied to the fast ring:
(the customer had done the content download several times and ended up always to this same situation with the files)
I opened the ConfigMgr.Update.Manifest.cab file and found a manifest.xml file. From there I found the download link for the Hotfix Rollup (Content ContentUrl=”https://download.microsoft.com/download/8/4/9/849D7BD4-9009-4330-977E-06E23AB19427/KB4462978/338EF926-78A7-4AB6-B5A1-5F12474F0BD3.cab “). Once the 338EF926-78A7-4AB6-B5A1-5F12474F0BD3.cab was downloaded and copied to ..\Microsoft Configuration Manager\EasySetupPayload\offline -folder with the ConfigMgr.Update.Manifest.cab I restarted the SMS_EXECUTIVE -service that did start the update process (You could also only restart the SMS_DMP_DOWNLOADER thread of the Configuration Manager SMS_Executive service). Soon after the status in SCCM console changed to “Ready to Install”. After launching the installation everything went as expected and now the site is updated with the 1806 Hotfix Rollup:
So at least you have some ways to download the missing files if you end up to same situation as my customer.
UPDATE 05.12.2018: Had a case with customer to implement this and had some time to re-visit this post again. Thanks to Todd Wilkolak and Clayton from the comment field I have made some adjustments to the PowerShell script.
I had request from my customer to extend the SCCM HW inventory to collect the SIM ICCID (Integrated Circuit Card ID). This is the identifier of the actual SIM card itself – i.e. an identifier for the SIM chip. Also the request was to get mobile broadband provider name.
This article is divided into three major steps:
Step 1: Server Side Configuration
Step 2: Client Side Configuration
Step 3: Processing the Hardware Inventory with NOIDMIF data
Step 1: Server Side Configuration
First we will create the MOF file according to a requirement specified, SIM ICCID and Provider Name.
We will pull the following information using NOIDMIF files from a SCCM client machine.
SIM_ICCID
Provider_Name
The MOF for creating a Class and its Attribute is as follows:
To create the MOF file, simply copy the lines above in red into Notepad and save the file with the extension .MOF
“MobileBroadband_Information” is the Group name which you will see in the Resource explorer under Hardware.
“SIM_ICCID” is the name of the Class.
“Highlighted” portion are Attributes whose values will be fetched up by processing the Hardware Inventory.
NOTE: You can create more attributes as per your specific requirements.
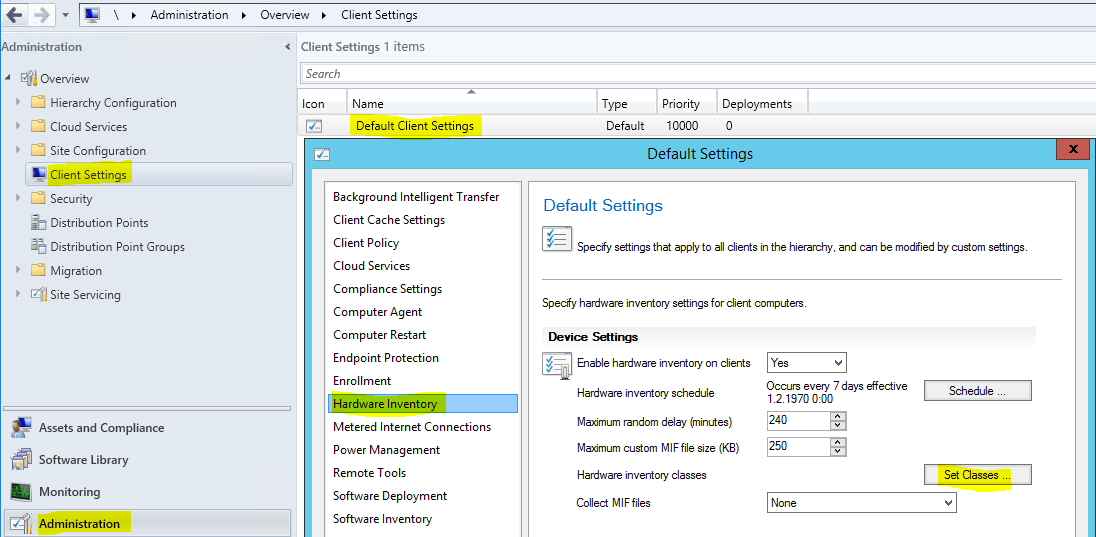
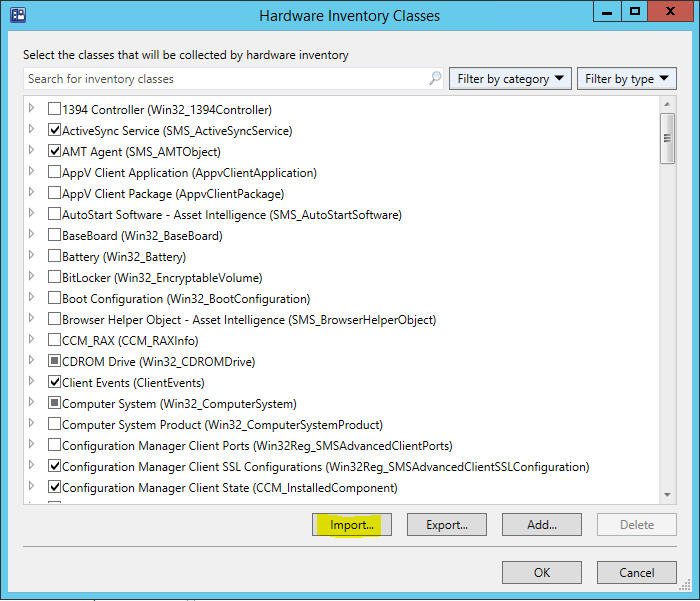
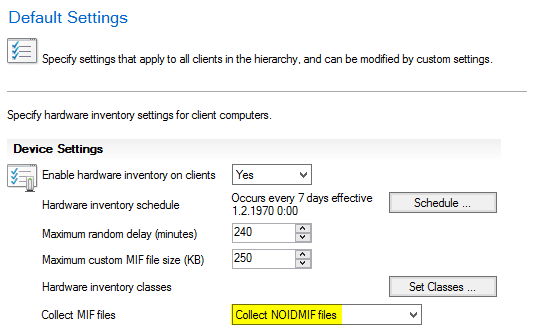
Once the file is saved with a .MOF extension we need to import it. To do this, go to the console and open Client Settings, choose Default Client Settings, since you can only extend the HW inventory on this Client Settings. Browse to Hardware Inventory and click on “Set Classes”
Then click on “Import”
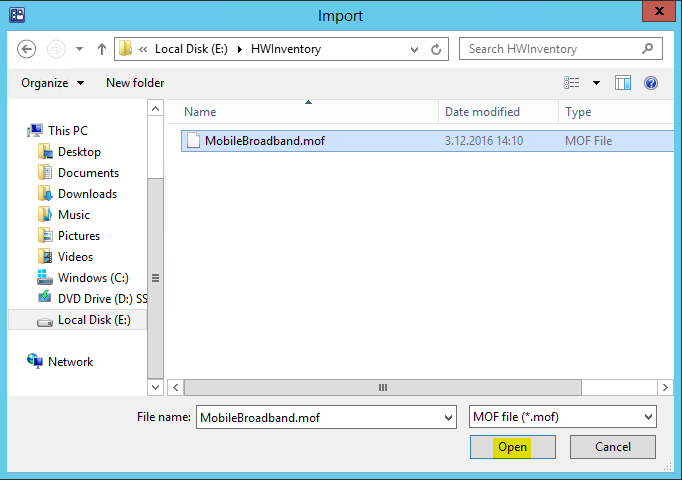
Browse to the location where you have saved the .MOF file and click Open
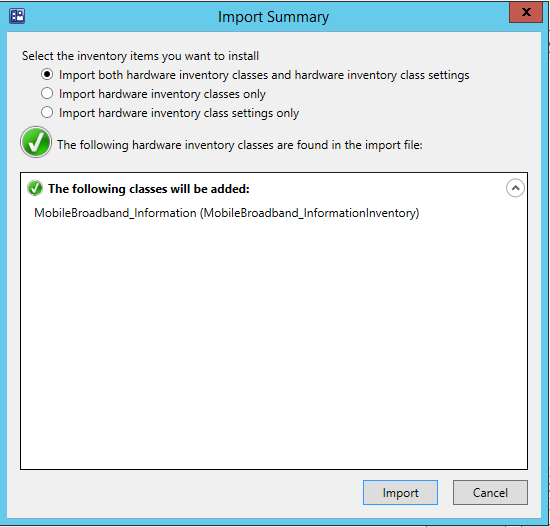
Select the option “Import both Hardware Inventory Classes and Hardware Inventory Class Settings”
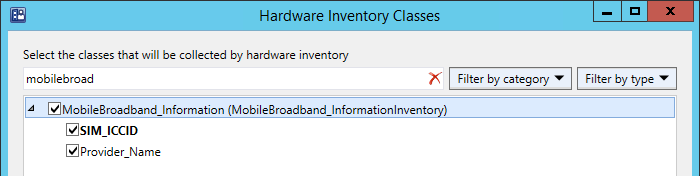
Once the Hardware Inventory class is imported, verify that the class is added by searching for it using its class name. By default it’s already selected but if not then select the Class. You can expand the Class to look into its Attributes as well.
After importing the MOF, be sure you enable the collection of NOIDMIF files as shown below.
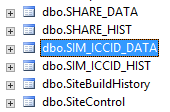
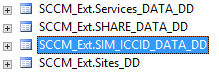
Now you can verify that new tables are created regarding the above class “SIM_ICCID” in the database.
At this point the configuration on the server side is completed so we will now move to the client side.
Step 2: Client Side Configuration
On the client side we need to create a .MIF file and copy it to the required location. The PowerShell script will create the .MIF file with its Class “SIM_ICCID” and its attributes specified below:
Start Component
Name = "System_InformationInventory"
   Start Group
     Name = "Mobile Broadband Information"
     ID = 1
     Class = "MobileBroadbandInformation"
     Start Attribute
       Name = "SIM_ICCId "
       ID = 1
       Type = String(40)
       Value = "12358022150401090967"
     End Attribute
     Start Attribute
       Name = "Provider_Name"
       ID = 2
       Type = String(80)
       Value = "elisa"
     End Attribute
   End Group
End Component
The highlighted two attributes above are required in our example. You can create more attributes to suit your specific requirements, but if you do, make sure the same Class and Attributes are created on the server side as well.
The .MIF file is created to the location: %Windir%\CCM\Inventory\Noidmifs
Let’s get the script rolling…
We will execute to commands:
Cmd.exe /c "netsh mbn show interface"
This will give us the following info of the mobile broadband interface:
There is 1 interface on the system:

   Name               : Matkapuhelinverkko
   Description       : Dell Wireless 5570 HSPA+ (42Mbps) Mobile Broadband Card
   GUID               : {CA732FF4-3AB8-424B-9899-81345BA2C713}
   Physical Address   : 1a:2b:3c:4d:5e:12
   State             : Locked
   Device type       : Mobile Broadband device is embedded in the system
   Cellular class     : GSM
   Device Id         : 123456789123456
   Manufacturer       : Sierra Wireless, Incorporated
   Model             : Dell Wireless 5570 HSPA+ (42Mbp
   Firmware Version   : SWI9X15C_01.12
   Provider Name     : Elisa
   Roaming           : Not roaming
   Signal             : 0%
   RSSI / RSCP       : 0 (-113 dBm)
From this info we will pick the provider name.
The second command that we will execute is
Cmd.exe /c "netsh mbn show read i=*"
This will give us the following info of the mobile broadband interface:
 Ready information for interface Matkapuhelinverkko:
-------------------------------------
   State           : Ready to power up and register
   Emergency mode   : Off
   Subscriber Id   : 123456789012345
   SIM ICC Id       : 1234567890123456789
   Number of telephone numbers : 0
From this info we will pick the SIM ICC Id.
I have created a PowerShell to build the MIF file:
This file contains bidirectional Unicode text that may be interpreted or compiled differently than what appears below. To review, open the file in an editor that reveals hidden Unicode characters.
Learn more about bidirectional Unicode characters
Write-LogEntry "******** Script Started ********" -ForegroundColor cyan
Write-LogEntry "Logging to: $LogFile"
Write-LogEntry "Get the content from the 'netsh mbn show interface' command."
$get_MBInfo = cmd /c "netsh mbn show interface"
Write-LogEntry "Read the content…"
If ($get_mbinfo -like "*There is no Mobile Broadband interface*") {
Write-LogEntry "There is no Mobile Broadband interface. Set the inventory status…" -ForegroundColor Yellow
$DeviceID = "No Mobile Broadband interface"
$ICCID = "No Mobile Broadband interface"
}
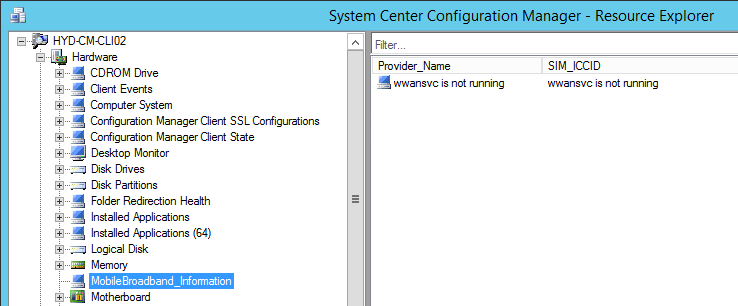
If ($get_mbinfo -like "*Mobile Broadband Service (wwansvc) is not running.*") {
Write-LogEntry "wwansvc service is not running. Set the inventory status…" -ForegroundColor Yellow
$DeviceID = "wwansvc is not running"
$ICCID = "wwansvc is not running"
}
# Read the second line (NOTE: line numbering start from 0) of the content
If ($get_mbinfo[1] -like "*There is 1 interface on the system:*") {
Write-LogEntry "There is 1 interface on the system…" -ForegroundColor Green
# Read info from specific line and split the line with ':'-delimeter. Trim spaces from the beginning and end of a string.
Write-LogEntry "Get Provider Name: Read info from specific line (16) and split the line with ':'-delimeter. Trim spaces from the beginning and end of a string."
Write-LogEntry "Get the content from the 'netsh mbn show read i=*' command."
$get_iccid = cmd /c "netsh mbn show read i=*"
Write-LogEntry "Get SIM ICC ID: Read info from specific line (5) and split the line with ':'-delimeter. Trim spaces from the beginning and end of a string." -ForegroundColor Green
$ICCID = $get_iccid[5].Split(":")[1].Trim()
}
Write-LogEntry "Create the inventory results to MIF -file (MobileBroadband.mif) and save it to %Windir%\CCM\Inventory\Noidmifs -folder"
# Create the inventory results to MIF -file and save it to %Windir%\CCM\Inventory\Noidmifs -folder
NOTE! Make sure you check the language you use, since if you use some other base language than English the returned value are in that language. Modify the script to language in use.
This PowerShell needs to be run on the client machine, so you can either make it run time to time on the machine with SCCM or you can set up a Task Schedule on the client machine to run the script.
Now the client side configuration is completed.
Step 3: Processing the Hardware Inventory with NOIDMIF data
Run the “Machine Policy Retrieval and Evaluation Cycle” on the client so the new policies regarding the new Hardware Inventory Classes are be received.
Run the “Hardware Inventory Cycle” on the client to send the new Inventory with NOIDMIF’s data. InventoryAgent.log will show that four new attributes regarding the Class “SIM_ICCID” need to be collected for hardware Inventory data and that info needs to be sent to server.The next line will show that “MobileBroadband_InformationInventory” does not exist, but you can ignore it.
Now the XML file from the client computer will be received by MP_Hinv and processed into a MIF file and sent to the SMS_INVENTORY_DATA_LOADER component (dataldr.box) for processing.
MP_Hinv.log:
The SMS_INVENTORY_DATA_LOADER component will receive file MIF file, process it, and then insert the data into the corresponding tables in the ConfigMgr database by running SQL stored procedures in the background.
NOTE To view the stored procedures you must enable verbose logging for the SMS_INVENTORY_DATA_LOADER component.
Dataldr.log:
In the ConfigMgr console, open Resource Explorer for the client computer and view the Processed NOIDMIF information. You will find a new component named “MobileBroadband_Information” with its Attributes and their values under HARDWARE. Since my virtual machine doesn’t have SIM card the result is as below:
NOTE All of the above results and screens shots are from my lab environment setup in a simple ConfigMgr v1610 configuration. It is recommended that you perform these steps in a test environment before implementing in a production environment.
Additional Information
NOIDMIF files themselves are not sent to the site server during a client hardware inventory cycle. The information that is contained within the NOIDMIF file is collected and added to the client inventory report.
When you create a NOIDMIF file, this must be saved in an ANSI encoded format. NOIDMIF files saved in UTF-8 encoded format cannot be read by Configuration Manager.
The Configuration.mof file is used to define the data classes to be inventoried by the hardware inventory client agent. Data classes can be created to inventory existing or custom WMI repository data classes or registry keys present on client systems.
The SMS_def.mof file defines the reporting classes used by the hardware inventory client agent to determine whether or not specific client data class information is reported. Reporting classes are based on the WMI repository data classes and attributes of those classes existing on clients by default or added to them by customizing the Configuration.mof file.
This is post is based on the original post found here, written by Frank Rojas
Senior Support Escalation Engineer at Microsoft. My post focus to SCCM Current Branch.
To inject the SMSTS.ini file into the Boot Images:
Using Notepad, create an SMSTS.ini file with the desired parameters. For example:
[Logging]
LOGMAXSIZE=5242880
LOGMAXHISTORY=5
When saving the file in Notepad, make to save it with an extension of .ini and not .txt.
Copy the SMSTS.ini file created in Step 1 into the appropriate directories on the ConfigMgr site server where the Boot Images are located. The file has to be copied to two separate directories – one for x86 Boot Image and one for x64 Boot Images.The directories to copy the file to are: <ConfigMgr_Install_Directory>\OSD\bin\i386
and
<ConfigMgr_Install_Directory>\OSD\bin\x64
In the ConfigMgr console, navigate to: Software Library –> Operating Systems –> Boot Images
Right click on the desired Boot Image to be updated with the SMSTS.ini file and choose Update Distribution Points.
In the Summary page of the Update Distribution Points Wizard window, click on the Next > button and allow the Boot Image to be rebuilt.
Once the Boot Image is finished rebuilding, in the Completion page of the Update Distribution Points Wizard window, click on the Close button.
Repeat Steps 4-6 for each Boot Image in the environment.
Once the Distribution Points have finished updating for each Boot Image, each Boot Image should have the updated log settings for the SMSTS.log.
UPDATE 21.11.2018: More easier process with PowerShell can be found at Johan’s blog post.
**************************************
This is an combination and update to Johan Arwidmark’s post and Alexey Semibratov’s post. So initial credits goes to them!
One of the greatest benefits of the MDOP software assurance add-on is Diagnostics and Recovery Toolset (DaRT). With DaRT you have the remote connection viewer that allows you to remote into WinPE during your SCCM OS Deployments.
Install DaRT 10 (MSDaRT100.msi) administrative install: msiexec /a MSDaRT10.msi. Accept the default settings on your Windows Server 2012 R2 site server
Using File Explorer, navigate to the C:\Program Files\Microsoft DaRT\v10 folder.
Copy the Toolsx86.cab file to C:\Program Files\Microsoft Deployment Toolkit\Templates\Distribution\Tools\x86
Copy the Toolsx64.cab file to C:\Program Files\Microsoft Deployment Toolkit\Templates\Distribution\Tools\x64
Create a new SCCM Boot image using the MDT wizard; select the DaRT component during creation.
Enable Monitoring in Deployment Workbench
To install the web service and database used for monitoring ConfigMgr you use MDT Deployment Workbench. In this example my site server is named CM01.
On CM01, using the Deployment Workbench, right-click Deployment Shares and select New Deployment Share.
Use the following settings for the New Deployment Share Wizard.
Deployment share path: D:\MDTDeployment
Share name: MDTDeployment$
Deployment share description: MDT Deployment
Options: <default settings>
Right-click the new MDT Deployment Deployment Share and select Properties.
In the Monitoring tab, select the Enable monitoring for this deployment share check box, and then click OK. Note: It will take a while for the Deployment Workbench to create the monitoring database and web service. The console even appears to hang, but no worries, just give it some time
Setup SCCM to use Monitoring
After enabling the monitoring feature, you need to configure the CustomSettings.ini file in your settings package. In these steps I assume you already created a MDT 2013 Task Sequence, a MDT 2013 package, and a Settings package as part of that process.
On CM01, using File Explorer, navigate to your Settings package.
Using Notepad, edit the CustomSettings.ini file, and add the following entry in the end: EventService=http://CM01:9800
Update the Distribution Points for Settings package
Implement earlier appearance of computers with Dart Remote Recovery console in MDT monitoring
Copy the to some location on the server, I’ll call it \\cm01\Sources\OSD\PreExecHook here
Copy the following files from C:\Program Files\Microsoft Deployment Toolkit\Templates\Distribution\Scripts to this folder:
ZTIDataAccess.vbs
ZTIDiskUtility.vbs
ZTIGather.wsf
ztiRunCommandHidden.wsf
ZTIUtility.vbs
Optional: Using Aut2exe.exe tool from AutoIt compile PreExecHook.au3 to x86PreExecHook.exe and AMD64PreExecHook.exe checking “64 bit” flag. You don’t have to use it, it is to suppress the “dos box” with script running by providing TS engine the EXE file instead of WSF. TS Engine always runs VB Scripts with CSCRIPT.EXE causing a big “dos” box with script running.
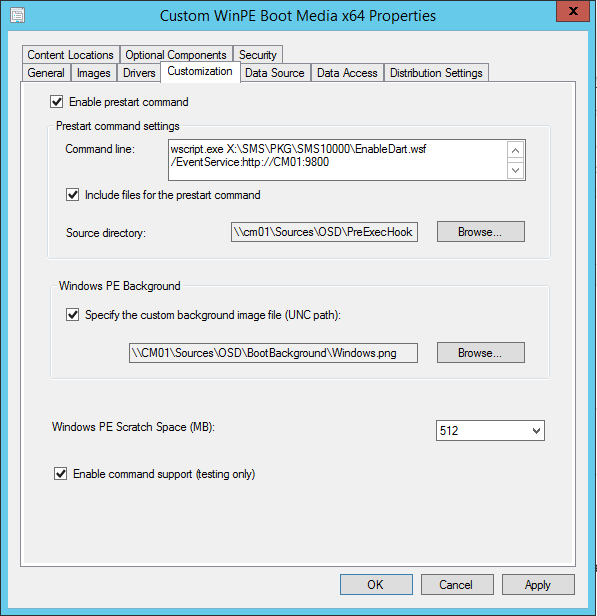
Go to properties of your Boot Image and go to “Customization”
Check “Enable prestart command” and type in “X:\SMS\PKG\SMS10000\x86PreExecHook.exe” without quotes for x86 boot image and “X:\SMS\PKG\SMS10000\AMD64PreExecHook.exe” for x64 boot image if you use the AutoIT EXE or use the WSF script: wscript.exe X:\SMS\PKG\SMS10000\EnableDart.wsf /EventService:http://cm01:9800
Check “Include Files for the prestart command” and use the path where you copied all the files to – i.e. \\server\Packages\PreExecHook
After clicking “OK” it will ask you to update Distribution Points. Go ahead and do it.
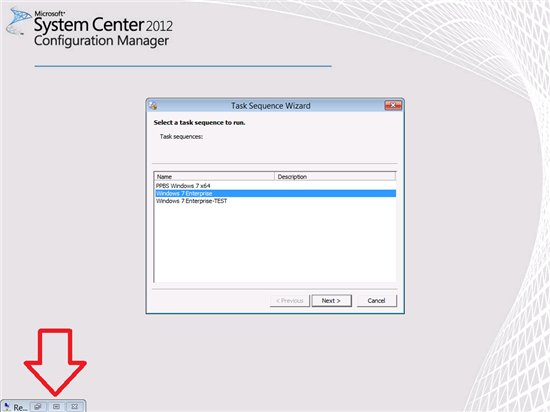
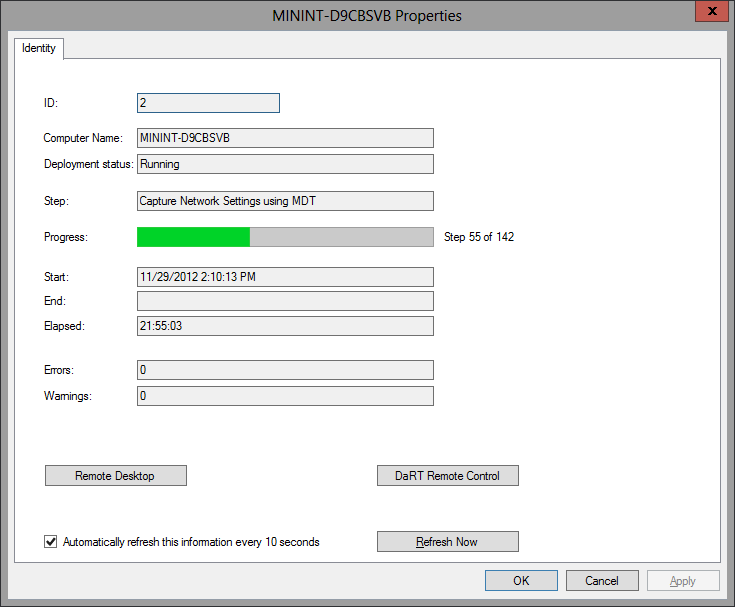
Now you will have your Remote Recovery Running earlier, like on this picture below – even before the task sequence selection!
Configure the task sequence to use the new boot image
If you have existing task sequences, you need to configure them to use the new boot image.
Configure your task sequence to use the new boot image, and start a deployment.
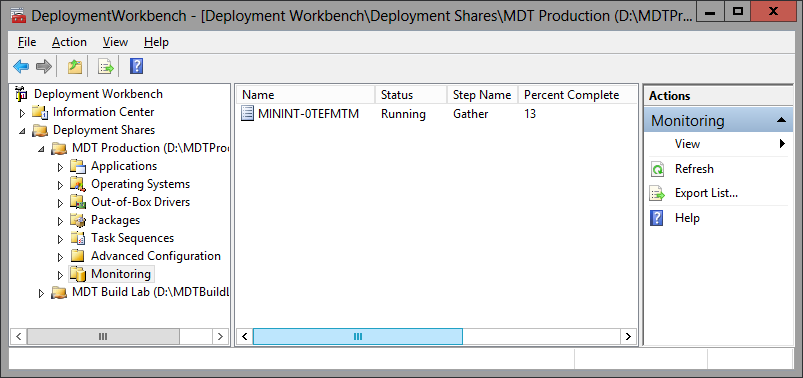
Using Deployment Workbench, when you see the client in the Monitoring node
you can double-click it, and then select DaRT Remote Control to remote into it.


 The next line will show that “MobileBroadband_InformationInventory” does not exist, but you can ignore it.